Hello!! I am so excited to open my blog about my passion - card making! Hope to meet more crafty friends and have fun here.
Here is the first card I'm sharing with you. Step-by-step photos were taken during the process to show how this card was made. Some of the supplies are listed at the end of the post.

 2. Getting ready for the heat embossing. Used the powder bag to prepare the surface of the card stock for heat embossing to avoid electrostatic charges and make the image nice and clean.
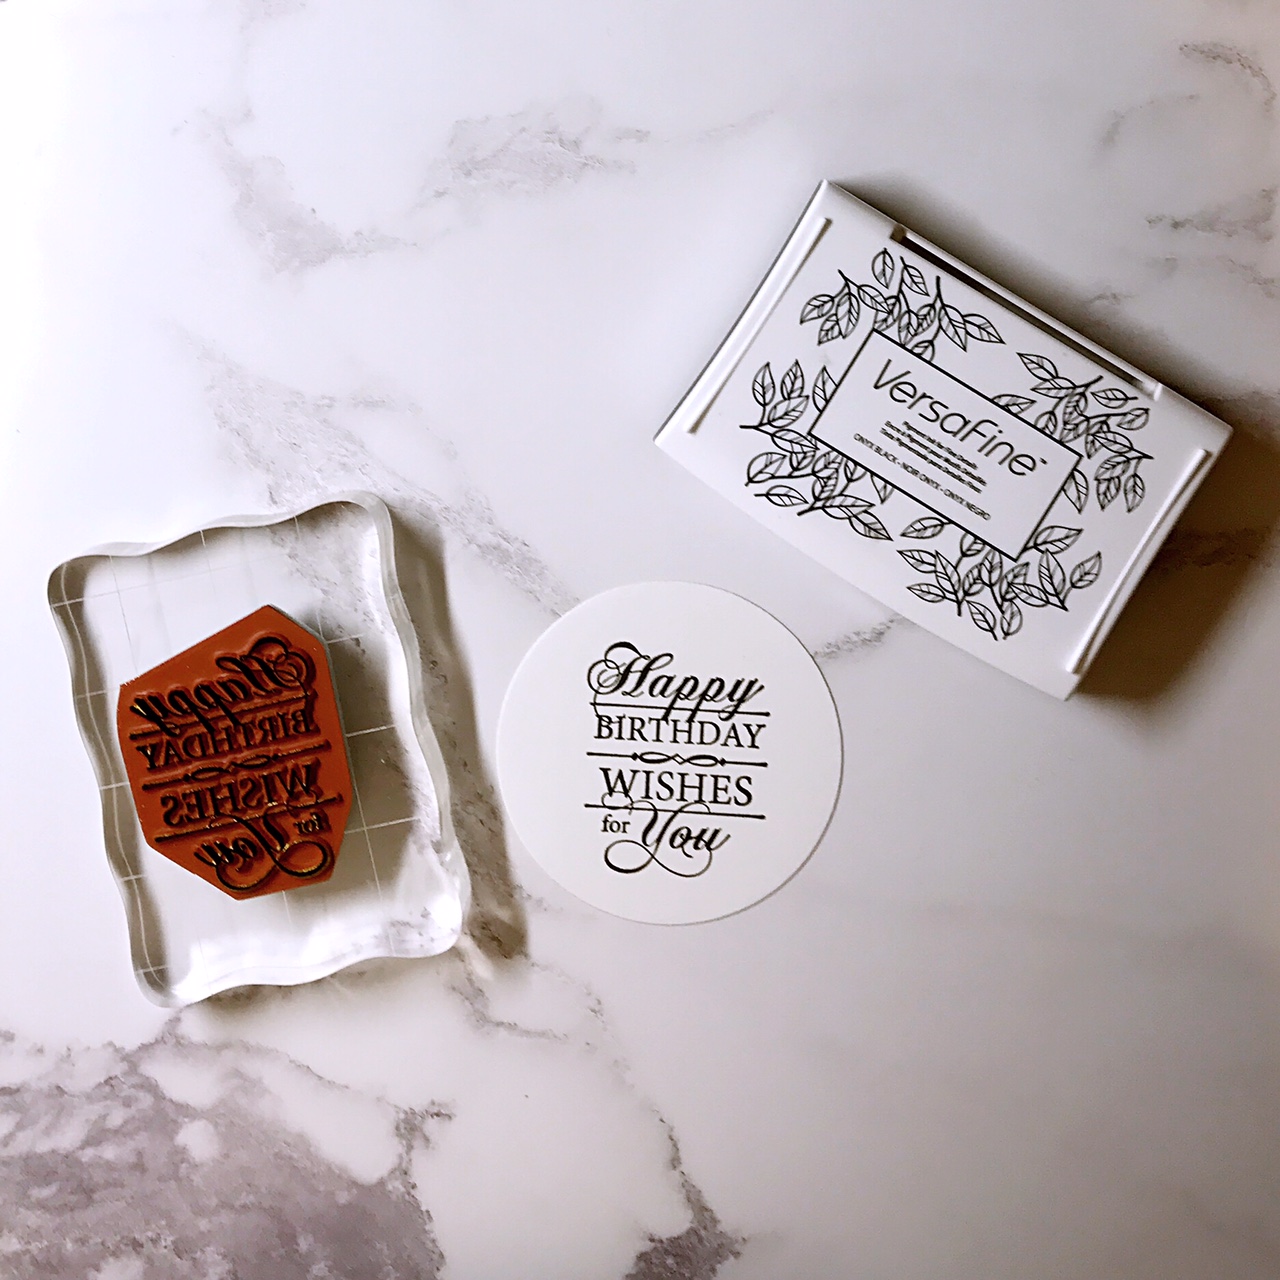
 3. Stamped the images with VersaMark ink. Put super fine gold embossing powder onto the images and tapped off any excess powder.


 6. Die-cut the images


Thanks for stopping by! Wish you a beautiful day! Happy crafting~~


Here is the first card I'm sharing with you. Step-by-step photos were taken during the process to show how this card was made. Some of the supplies are listed at the end of the post.

STEPS
1. Prepared card stock for the card base and card front. The size of the card was A2 (5.5'' x 4.25''). 110 lb cover card stock from Michael's was used as the card base, and 80 lb cover card stock from Neenah Solar White was used for the card front.


4. Heat up the images with a heat gun

5. Watercolor the images. This is the most soothing step 😊


7. Stamped on the sentiment.
8. Stitched the background using Lil'inker Design's quilted swirl stitched pattern die to give the background some interesting texture.

SUPPLIES


So very Beautiful! Great step-by-step photo tutorial🤗
ReplyDeleteThank you so much for the first-ever comment in my blog! And congratulations on the Altenew blog hop winner!!
DeleteSuch an amazing blog. I love your post. ❤️
ReplyDeleteThank you so much!! ❤️
DeleteGorgeous card!
ReplyDeleteThank you sew much! ;P
DeleteWhat a very beautiful card! I just found it on Altenew's blog - so happy you shared it. I love this stamp set and am always looking for how carmakers have used it. Gorgeous watercoloring and love the bright colors with the gold embossing. The background texture adds an unexpected touch. Love!
ReplyDeleteThank you so much! :D
DeleteHi,
ReplyDeleteHow did u get ur blog up and running? Im not twch savy and i started one but it looks terrible compared to this. Maybe u could email me? Id really appreciate it. Devinsmommie523@gmail.com
It looks beautiful!
It was not very straight forward to me at the beginning. I just tried all of the options in the "settings" of the blog and then view the blog to see how it turned out. Hope this helps. Keep trying!
Delete